How cool is that! Download it HERE. One of my favorite photo effects is the vintage film effect, which is super cool and easy. Here's the step by step instructions:
1. Open image. File>Open
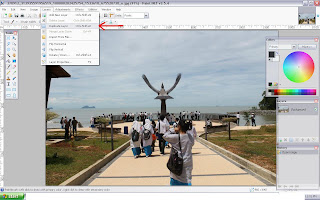
2. Duplicate Layer.. Layers>Duplicate Layer
3. Click Layer Properties and rename into Sepia
4. Apply Sepia. Adjustments>Sepia
5. Click check box to deselect Sepia layer
6. Adjust saturation to 115. Adjustments >Hue/Saturation
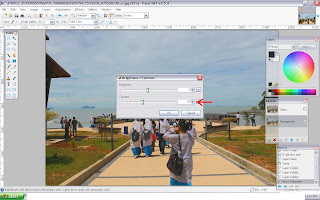
7. Set Contrast to -20. Adjustments>Brightness/Contrast
8. Open Curves and set transfer map to RGB. Adjustments>Curves
9. Deselect green and blue. Adjust red till it looks like the picture below. (Follow the coordinates).
10. Do the same for green....
11. and blue
12. Select sepia layer
13. Click Layer Properties and set Opacity to 120
14. Then, add a new layer. Layers>Add new layer. Rename it into magenta
15. Click more on colors. (If you cant find it, click window>colors)
16. On the HEX value, key in FF00DC
17. Click the paint bucket and click on the picture. It will look like this:
18. Click layer properties, set blending mode into screen and opacity to about 80. You can set it into a lower value if you think its too pink.
19. Flatten the image. Image> Flatten
And you're done!
#any problems, questions, just drop a comment down here kay :) I'll be glad to help you.


Tidak ada komentar:
Posting Komentar